I’ve seen amazing recoveries in my patients who follow guided ankle physio exercises, such as the ankle alphabet, lateral bounding, or single leg balancing.
Wondering what in the world the ankle alphabet is? Read on to learn about some of the common ankle physio exercises I incorporate in rehabilitation routines and how to do them.
Quick Summary
2. Active assisted range of motion with towel
3. Resisted ankle movements with band (flexion, inversion, eversion)
Top 7 Ankle Physio Exercises
Here are 7 ankle physio exercises I utilise the most at Physio and Exercise Lab.
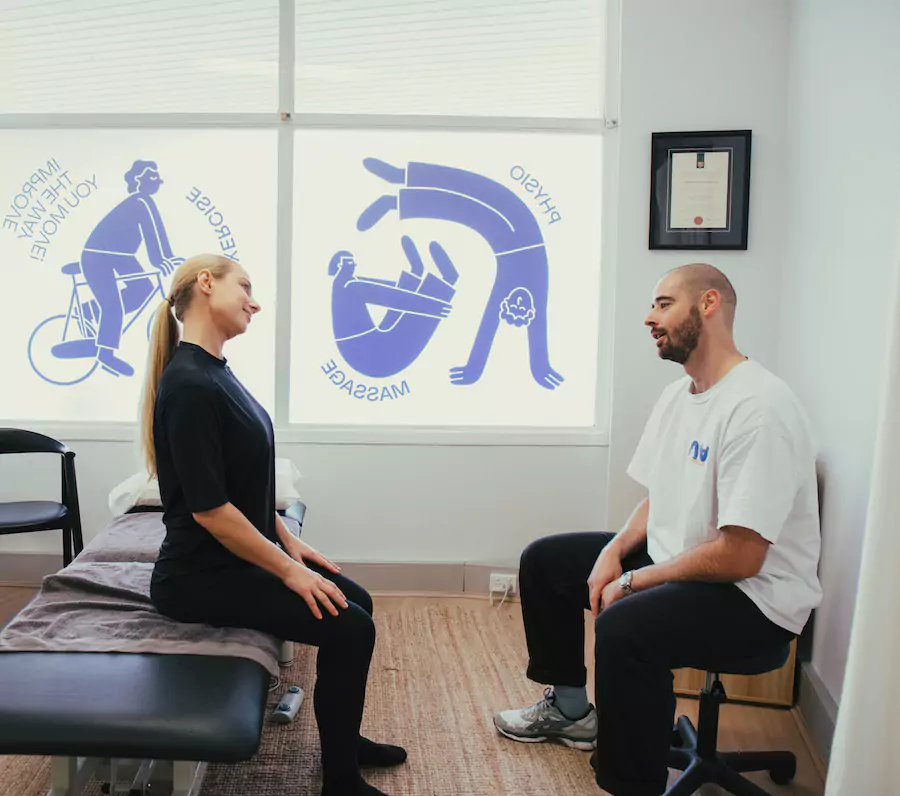
Before beginning any exercise program, always get approval from your general practitioner, physical therapist, or physiotherapist.
1. Ankle Alphabet
The ankle alphabet is a simple yet effective exercise for improving range of motion and promoting recovery.
Since it does not require weight-bearing movements, the ankle alphabet is one of the best ankle physio exercises if you are just starting the recovery process.
Every patient is unique, but I almost always incorporate the alphabet exercise into ankle recovery programs.
It’s highly effective yet does not require weight-bearing movements that place additional strain on a tender ankle.
Benefits of the ankle alphabet
- Improvements in range of motion
- Promotes enhanced flexibility
- No weight bearing involved
- Can be done from a sitting position or while lying down
How to do the ankle alphabet
- Sit on a bed or chair with your feet flat on the floor
- Lift up your injured foot several inches off the floor
- Use your injured ankle to draw the alphabet, starting with the letter “A” and going one letter at a time until you reach “Z” (it can be helpful to imagine your big toe as a pencil)
- Repeat with the other ankle
Note: If you find it more comfortable, you can complete this exercise while lying down. Lie on your back, prop up your injured leg with a pillow, and slowly lift your foot in the air to trace the letters from A to Z.
2. Active Assisted Range of Motion with Towel
When I work with clients, this is one of the ankle physio exercises they seem to enjoy most.
Many of my clients report a ‘great stretch’ and ‘pain relief’ when they practice assisted range of motion regularly.
Benefits of active assisted ankle range of motion
- Builds strength
- Promotes mobility
- No weight-bearing movements required
How to do an active assisted range of motion with a towel
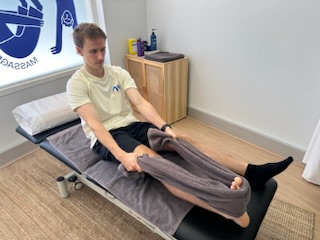
- Sit on the floor with your legs extended
- Loop a towel around your foot right under the toes, holding each end of the towel with your hands
- Keep your knees straight and hold your hands near or just past your knees
- Pull back gently with the towel to stretch your foot toward you
- Hold for 15 to 30 seconds, taking care not to strain or force any movements
- Repeat 2 to 4 times
Note: If you enjoy this stretch, you can repeat this ankle stretch up to 5 times a day. Make sure to complete the active assisted ankle stretch on your non-affected foot too.
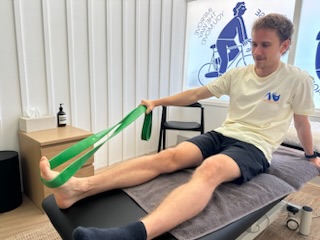
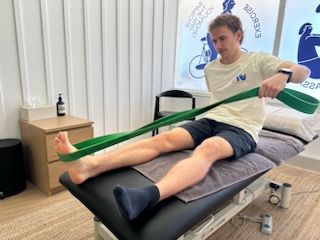
3. Resisted Ankle Movements with Band: Plantarflexion, Inversion, and Eversion
There are a variety of excellent resistance movements that can be utilised for ankle strengthening and recovery.
The most common ankle physio exercises I like to combine with resistance involve plantarflexion, inversion, and eversion.
Inversion involves pointing your ankle inward toward your body’s midline. Eversion is pointing your ankles away from your midline. Plantarflexion involves pointing your toes away from your body.
Benefits of resisted ankle movements
- Builds strength
- No weight-bearing movements required
- Helps improve range of motion
- Increased flexibility
How to do resisted ankle plantarflexion
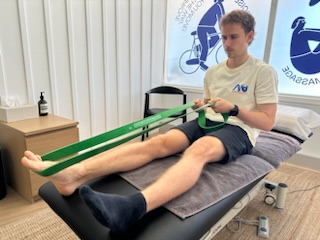
- Sit with legs extended or sit in a chair with one leg extended
- Loop the resistance band under your foot and hold each end with your hands
- Using your ankle, point and extend your foot, pushing against the resistance
- Hold for 2 seconds before returning to the starting position
- Repeat 8 to 10 times
How to do resisted ankle inversion
- Sit on the floor with legs extended
- Loop an exercise band under your affected foot
- Hold each end of the band with your hands
- Keep your toes pointed up as you move your foot inward using your ankle
- You should feel a good stretch but no strain or discomfort
- Hold for 10 to 15 seconds
- Return to a neutral position
- Repeat 8 to 10 times
How to do resisted ankle eversion
- Sit on the floor with legs extended (you can also sit in a chair and extend the leg with the affected foot)
- Loop a resistance band around the outside of your injured foot, holding the ends with both hands
- Press your non-injured foot against the band
- Keeping your leg straight, slowly push your affected foot outward against the band and away from your other foot without letting your leg rotate. Then slowly relax.
- Repeat for a total of 8 to 12 times
Note: To modify, simply eliminate the use of the resistance band and complete the inversion, eversion, and flexion motions.
4. Single Leg Balance
Once you’ve mastered non-weight-bearing ankle physio exercises, you will likely move on to partial weight-bearing movements.
The single-leg balance is an excellent way to progress in your ankle recovery and start tolerating weight-bearing movements.
This move can be easily modified depending on where you are at in your ankle recovery.
Benefits of the single-leg balance
- Helps the ankle slowly begin adjusting to weight-bearing movements
- Challenges your balance
- Supports improvements in mobility
- Builds strength in both ankles, the feet, and the lower legs
How to do the single-leg balance
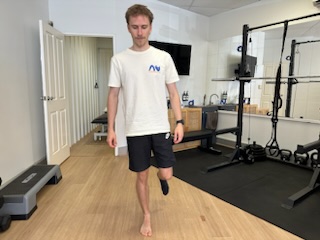
- Stand with both feet flat on the floor and your arms at your sides
- Slowly shift your weight slightly onto your injured foot and allow your uninjured foot to lift off the floor by bending your knee
- Continue balancing on your foot for 10 to 15 seconds, working your way up to 30 seconds at a time
- Relax and allow your unaffected foot to come back to the floor
- Rest for 10 seconds
- Repeat 6 to 8 times
Note: To make this exercise easier, use a wall or object to steady yourself. To make this exercise harder: Close your eyes as you complete the exercise or try carefully standing on a pillow.
5. Single Leg Heel Raise
Once you tackle the single leg balance with ease, you can up the challenge even further.
The single-leg heel raise is a weight-bearing exercise I often use in ankle recovery routines.
It is an effective yet fairly gentle introduction to weight-bearing ankle exercises.
This is one of the more advanced ankle physio exercises, so check the modifications if you struggle with this one at first.
Benefits of the single-leg heel raise
- Builds strength in the feet, ankles, and lower legs (prepare for major calf burn!)
- Challenges balance
- Promotes ankle flexibility
How to do the single-leg heel raise
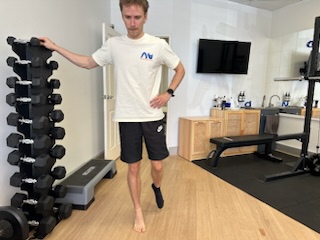
- Stand upright with both feet flat on the floor
- Shift some of your weight onto your injured foot to slowly lift your uninjured foot off the floor
- Maintaining your balance, lift the heel of your injured foot off the floor to do a calf raise
- Hold for 10 to 15 seconds
- Slowly lower your heel back to the floor
- Use a sturdy object or wall to help balance if needed
Note: If this is too difficult, practice raising the heel of your injured foot while keeping your other foot flat on the ground. Still too difficult? Try modifying the single leg heel raise from a standing to a sitting position.
How to do partial weight-bearing heel raises
- Sit in a chair with both feet on the floor
- Slowly and carefully lift your heel on your injured foot, keeping your toes on the floor
- Return your heel to the floor
- Repeat for a total of 8 to 10 reps
- Repeat on the other side with your non-injured ankle
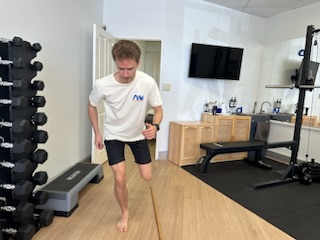
6. Forward Bounding
Forward bounding is an effective, advanced ankle exercise.
This will challenge your proprioception and re-introduce your ankle to full weight-bearing exercise and jump training.
Benefits of forward bounding
- Helps build strength and muscle in the ankle and lower legs
- Helps increase mobility
- Improves proprioception and loading ability
- Can help you regain enough strength to get back into the activities you used to enjoy, such as sports or running
How to do forward bounding
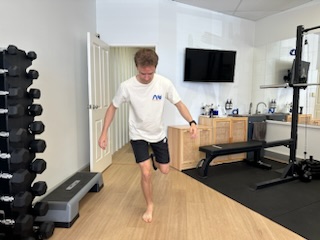
- Start on your injured foot. Taking off from your injured foot jump forward to land on your uninjured foot
- Once you’ve stuck the landing, jump forward off your uninjured foot and land on your injured foot
- Repeat this process moving forward up to 10 times
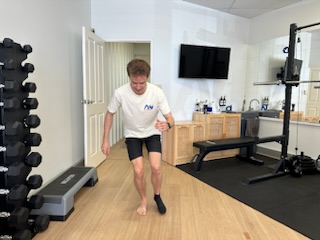
7. Lateral Bounding
Similar to forward bounding, lateral bounding is one of the most advanced ankle exercises on this list.
Since it involves plyometrics, a form of jump training, it is crucial to be cleared for weight-bearing exercises and check with your doctor or physiotherapist before attempting.
Benefits of lateral bounding
- Helps build muscle and strength in the lower legs and ankles
- Helps increase mobility
- Challenges balance
- May help you regain enough strength to get back into the activities you enjoyed pre-injury
How to do lateral bounding
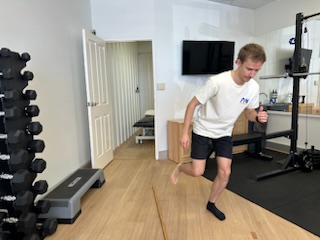
- Start on your injured foot. Taking off from your injured foot jump sideways to land on your uninjured foot
- Once you’ve stuck the landing, jump sideways back off your uninjured foot and land on your injured foot
- Repeat this process moving laterally up to 10 times
Note: If lateral bounding is too difficult or causes strain or pain, step laterally back and forth rather than jumping.
How to Speed Up Ankle Recovery Safely
Recovering from an ankle injury requires a careful and methodical approach to ensure complete healing and regain full functionality.
Below I have outlined my top recommendations to speed up your ankle recovery safely:
- Emphasise slow, thoughtful rehabilitation: It’s important to avoid rushing your ankle’s recovery, as this can lead to discomfort and the risk of re-injury. Take the rehabilitation process seriously and proceed with caution.
- Follow professional advice: Always adhere to the guidance of your doctor or physiotherapist to engage in safe recovery practices. Ignoring this advice can extend the recovery period unnecessarily.
- Progressive exercise regimen: Begin your rehabilitation with non-weight-bearing exercises and gradually advance to partial and then full weight-bearing exercises. Once these are mastered, progress to balance and sports-specific movements, only as recommended by healthcare professionals.
- Commit to the process: With consistent effort and guidance from an ankle physio specialist, you can successfully recover and regain the strength and mobility needed to resume daily activities and enjoy an active lifestyle.
Need Help With Your Ankle Exercises?
Whether you injured your ankle in the past and never regained mobility or are just starting your ankle recovery, our team is here to help.
We offer a range of ankle-focused physiotherapy services, including:
- General physio ankle strengthening exercises
- Physio exercises after a broken ankle
- Physio exercises for ankle ligament damage
- Physio exercises for sprained ankle
Contact our team of physiotherapists with questions or to book your ankle physio appointment.
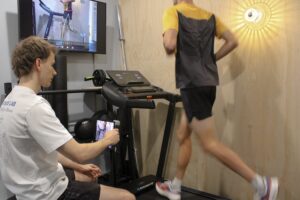
For running enthusiasts, we also offer a comprehensive video running gait analysis and musculoskeletal assessment for $150 (private health rebate applicable) to improve your form and reduce your risk of injury.
Disclaimer: This information is for educational purposes only and should not replace professional medical advice. Always consult a qualified healthcare provider before starting any new exercise programme.